My current layout started on a single hollow-core door. This is a standard shortcut for many N-Scalers, although in retrospect I would have built a more sturdy platform with a conventional plywood base, it was quick and easy to set up.
Since my first N Scale layout, I've learned a lot. This page shows the very primitive track plan, which led to the boredom that led to an expansion to Layout Version 2. I have been working on Version 3 for some time (which includes the addition of a tram line, the removal of the depressed section and expansion of the city, a viaduct, and an extension for a large passenger terminal). I hope that there will be no need for a "Version 4", but as the below photos are compared with my later work, it becomes apparent that the evolution of my layout is improving over time!
As you can see in the above photo, a couple of loops, with a 'depressed section' on the other end where there was also a small loop of track.
The depressed section originally was more 'industrial' with a refinery and a factory for the small loop of track to service.
This small loop of track in the depressed section also had a short tunnel! Why? Because every layout has to have a tunnel! I was quite proud of my street work at the time....looking back now they don't look as good as I remember.
Another 'tunnel' photo. The street lights I had installed at the time were the very cheap kind you can order from China on eBay. I had they hooked up to 12v of power and they would get really hot and melt! At the time, I had no knowledge of how to use resistors to control the voltage, and eventually I ended up replacing these with the much nicer (although much more expensive) Viessmann street lights.
A final look at the 'depressed section' under the Kato double-track elevated sections which encircle it. Even when this area was converted to a more residential area with Layout Version 2, I found the 'depressed section' very uninteresting.
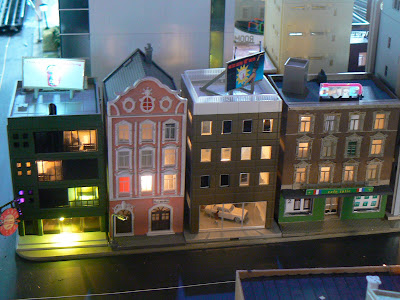
My 'urban modelling' abilities were still pretty limited as the above photo shows. I was using LED's but hadn't yet figured out how to solder my own. The above are fairly typical Model Power and Kato/Tomix structures with some minor painting and lighting work.
One of my first attempts at a significant modification was converting a fairly plain looking 'Model Power' (I think its really Pola) "Theater" into something much cooler. I was able to get the 'Theater Marquee" animated sign from Miller Engineering to bend so that it would make a nice round (and large) marquee over the entrance. The instructions from Miller Engineering state very clearly this should not be done, but I got it to work. Unfortunately, its stopped working since this building was removed from the layout for Version 3 work.
Some things haven't changed a lot. My Kato Overhead station will be in approximately the same location, but has undergone a lot of modifications since this photo was taken.
My 'yard' capabilities were fairly limited, with two short (and one really short) sections of track. Enough space to stash a few cars, but not enough for a train. The one part of Layout Version 1 that really worked well, and I miss, is that there was a sloping 'embankment' between the rails and the edge of the layout (you can see this on the right side of the above photo). This provided a really nice look and feel for the 'edge' of the layout that I lost when I later used this space to add more 'main line' trackage on the lower level.
And finally, a night shot of the RAm Tee in the yard area.
As I recall, I put together this layout fairly quickly. Unfortunately, in some areas it shows! On the other hand, it was no problem to remove the Unitrack and reuse it in other areas for Version 2. This flexibility is also a curse, as it makes it more difficult to finally make that choice and do some final ballasting and detailing in case another revision is planned for a later date!


