It's done!
And it only took a year! Literally.
It was a year ago when I had my basic plan for how I would construct an early 20th Century style elevated metro/subway station.
Hey, these things take time!
Below are some photos picking up from my last post. As you can probably tell from the photos, lot's of strip styrene....
For the windows on the roof, I had some transparent Evergreen Plastics sheets on which I masked and spray painted horizontal lines to simulate window panes. On top of this I glued pre-painted styrene strips.
Of course now with the roof finished, I can start to enjoy the station area a bit more!
One of the many tasks that made the project take time, is having to complete various details. The station platforms were built from scratch, painted, marked with pencil, and of course had people and various bits of details added. Something like this can slow down actual roof construction for several weeks!
Interior view with platforms..
I almost did not have glass windows on the roof, but I knew that I would regret not being able to see the station interior from the top, plus I like a bit of ambient light coming out of the station! So I'm glad I did it, but it was yet another complication to the roof project that added at least a month of work.
So, with the station really almost done (Not true: Still a few more details) I can start working on the rest of the city and (believe it or not) actually putting down tracks for the 'main lines'!
Thanks for reading!
Showing posts with label tram. Show all posts
1.08.2017
2.07.2016
Metro Line Progress and Latveria Station Decisions
I completed one of the gradual curves for the metro line that will link it to the 'turnaround' curve. This was decidedly challenging as I needed a curve that wasn't based of a track radius (flex track will go on this part). After some time thinking about how to create this very slight 's' curve, I finally decided to cut the center portion of the curve from a larger sheet of Sintra. This formed the 'spine' of the structure, and I then glued by Styrene cross beams onto this. It worked!
The below picture shows how everything will eventual 'line up'. The red surface areas is going to be where the station platform will be.
I also did a 'test' to see how well my Kato Ginza Metro Line train will perform on the Minitrix R1 radius curves....and I don't think there will be any problems. Granted, I don't think I want to even think of going more narrow than R1, but it seems to just work on this tight radius! Whew! As you can see in the below photo, I also test to ensure that my track distance was adequate (I'm pretty much going with the 'default' different for these Minitrix curves, so I didn't anticipate any issues, but you never know!).
What has become a little bit of a mental challenge is the construction of Latveria Station. As I mentioned in my last post, the Kato 23-125 Elevated Station is too modern and also too large for what I want with Latveria station. So I'm going to be using Walthers Northern Light structure to create a brick structure/facade for the station. This is completely freelance, based on what I think an old Metro line station should look like, the closest real world example found in the real world (and the internet!) is Hackescher Markt S-Bahn Station.
The challenge I am trying to work through is how (and IF) to align the brick facades, portals, windows, with the 'interiors' - particularly the stairs and so forth. I think I like the idea of a more open, pedestrian area such as the Kato station is designed, but nothing lines up well with the Northern Light brick facades - which means I need to do a lot of cutting and splicing, or go a different route with the interior altogether. Hmmmm.
Stay tuned. Perhaps next week I'll have made a decision!
The below picture shows how everything will eventual 'line up'. The red surface areas is going to be where the station platform will be.
I also did a 'test' to see how well my Kato Ginza Metro Line train will perform on the Minitrix R1 radius curves....and I don't think there will be any problems. Granted, I don't think I want to even think of going more narrow than R1, but it seems to just work on this tight radius! Whew! As you can see in the below photo, I also test to ensure that my track distance was adequate (I'm pretty much going with the 'default' different for these Minitrix curves, so I didn't anticipate any issues, but you never know!).
What has become a little bit of a mental challenge is the construction of Latveria Station. As I mentioned in my last post, the Kato 23-125 Elevated Station is too modern and also too large for what I want with Latveria station. So I'm going to be using Walthers Northern Light structure to create a brick structure/facade for the station. This is completely freelance, based on what I think an old Metro line station should look like, the closest real world example found in the real world (and the internet!) is Hackescher Markt S-Bahn Station.
The challenge I am trying to work through is how (and IF) to align the brick facades, portals, windows, with the 'interiors' - particularly the stairs and so forth. I think I like the idea of a more open, pedestrian area such as the Kato station is designed, but nothing lines up well with the Northern Light brick facades - which means I need to do a lot of cutting and splicing, or go a different route with the interior altogether. Hmmmm.
Stay tuned. Perhaps next week I'll have made a decision!
12.26.2015
Starting with "Quinntopia Metro"
Hello! And a belated "Merry Christmas"! Well, I have not made as much progress as I had hoped by now, but with the holiday preparations and all that, I have not had as much hobby time as I had thought! But this unplanned delay is a good thing as it gives me time to consider or reconsider how to accomplish different aspects.
Case in point is the "metro line". The metro will be an elevated line that I am imagining will snake through the city. As such, before any city planning can be done, the exact track layout for the two-track metro line needs to be determined (which is also constrained by the outer loops of the 'main line railways).
My original approach was to use Unitrack curves - the 216 and 249 radius curves -which would then connect to Atlas flex track for the non-curved sections. I decided not to use existing Kato viaduct sections as the walls are a bit too overwhelming and would block the trains. I wanted something a bit different, so I knew I would be scratch-building some sort of viaduct/elevated structure. So my original concept was to use 1/8" thick PVC foam board (one of my materials of choice!) as the base, and then mount the Unitrack to this material - with some sort of siding to make it look like an elevated trestle or viaduct system.
However, as I was browsing online various prototype photos of the U-bahn, Chicago El, NYC's elevated sections, I began to see the problem. The Unitrack ballast just won't look quite right and is not really a feature of elevated track. So..what to do? I also notice that a lot of elevated sections tend to be nothing more than girders, ties, and rails. Not a lot of 'flat space'.
So what I decided to do was abandon Unitrack and go with some classic snap track - in this case I'll be using Minitrix's R1 and R2 radii curves (which also means much tighter curves at 194.6 and 228.2 radii - which should be better for my cityscape than the wider curves. I am a bit concerned that these might be TOO tight, but as this is going to be a metro system, it's not like I'll be running any TGVs or traditional passenger cars on this line - well, at least that option is gone now!).
So I started with a new plan for my viaduct. After several different attempts using various easily available and cost efficient materials, I ended up with a plan that will use Evergreen Scale Models 1/4" thick plastic strips along with 1/4# wooden dowels available at the hardware store.
Across these structure sections will rest 0.80x0.80 square styrene strips that will support the actual track.
I'm using a 17mm spacing between the ends of the ties for each track, which will be identical to the doubletrack spacing of Unitrack sections, which seems like a useful benchmark.
Using my handy chopper (after a couple of years of gathering dust!) I'm back in business slicking strips of wood to make up the main structure!
Case in point is the "metro line". The metro will be an elevated line that I am imagining will snake through the city. As such, before any city planning can be done, the exact track layout for the two-track metro line needs to be determined (which is also constrained by the outer loops of the 'main line railways).
My original approach was to use Unitrack curves - the 216 and 249 radius curves -which would then connect to Atlas flex track for the non-curved sections. I decided not to use existing Kato viaduct sections as the walls are a bit too overwhelming and would block the trains. I wanted something a bit different, so I knew I would be scratch-building some sort of viaduct/elevated structure. So my original concept was to use 1/8" thick PVC foam board (one of my materials of choice!) as the base, and then mount the Unitrack to this material - with some sort of siding to make it look like an elevated trestle or viaduct system.
However, as I was browsing online various prototype photos of the U-bahn, Chicago El, NYC's elevated sections, I began to see the problem. The Unitrack ballast just won't look quite right and is not really a feature of elevated track. So..what to do? I also notice that a lot of elevated sections tend to be nothing more than girders, ties, and rails. Not a lot of 'flat space'.
So what I decided to do was abandon Unitrack and go with some classic snap track - in this case I'll be using Minitrix's R1 and R2 radii curves (which also means much tighter curves at 194.6 and 228.2 radii - which should be better for my cityscape than the wider curves. I am a bit concerned that these might be TOO tight, but as this is going to be a metro system, it's not like I'll be running any TGVs or traditional passenger cars on this line - well, at least that option is gone now!).
So I started with a new plan for my viaduct. After several different attempts using various easily available and cost efficient materials, I ended up with a plan that will use Evergreen Scale Models 1/4" thick plastic strips along with 1/4# wooden dowels available at the hardware store.
Across these structure sections will rest 0.80x0.80 square styrene strips that will support the actual track.
I'm using a 17mm spacing between the ends of the ties for each track, which will be identical to the doubletrack spacing of Unitrack sections, which seems like a useful benchmark.
Using my handy chopper (after a couple of years of gathering dust!) I'm back in business slicking strips of wood to make up the main structure!
And so, the initial straight section is complete! If this approach works out, then I'll proceed to creating the curves and the station section using the same basic format.
12.24.2010
Not a Creature Was Stirring....
Except for a Modemo Mo3501 "Sala-Go"....
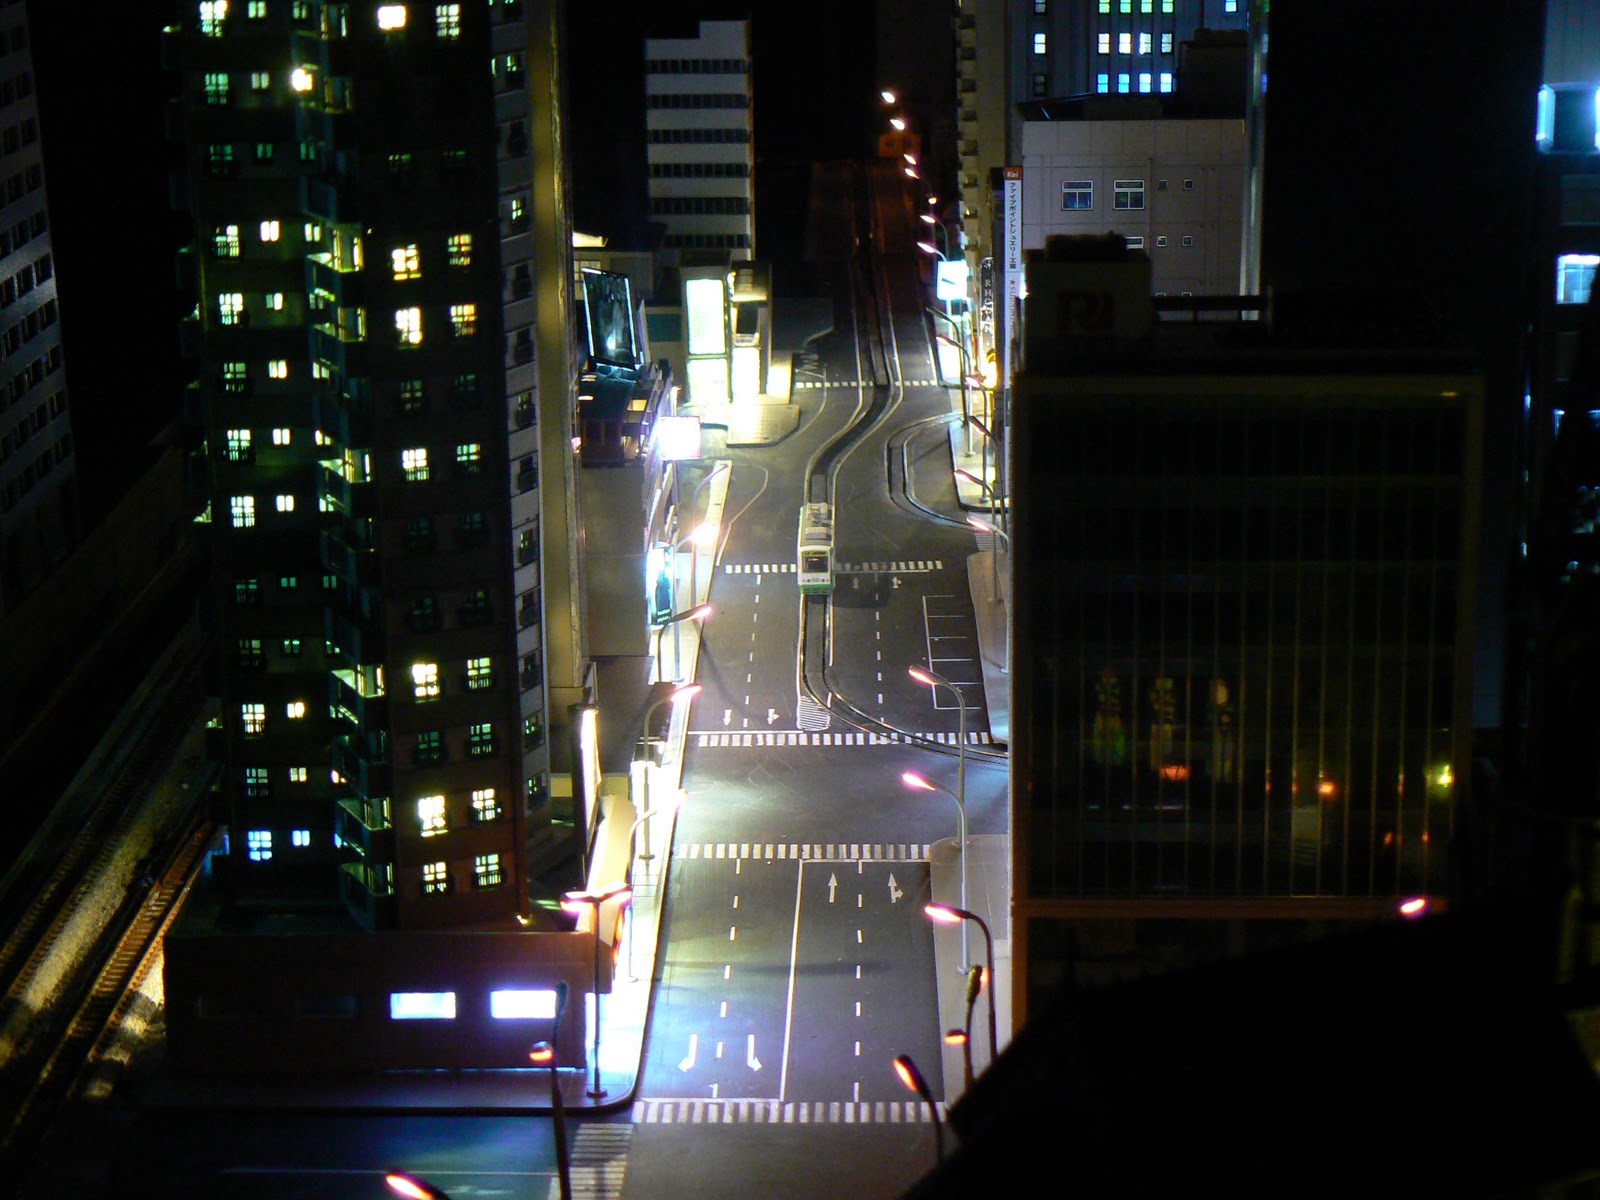
Wandering through empty streets....
But with plenty of light....
Perhaps its the Eve of Christmas and everyone's at home with family and friends? Merry Christmas/Happy Holidays!
Wandering through empty streets....
But with plenty of light....
Perhaps its the Eve of Christmas and everyone's at home with family and friends? Merry Christmas/Happy Holidays!
3.01.2010
Tram Line Construction Continues....
I really, really, really want to be done with the tram line. I 'jumped the shark' on this last month, but after completing the bridge, I could finally go back in and 'fill in' the gaps on the rest of the tram line- which means more plaster, sanding, painting, track-cleaning, etc.... I really don't like this part of it. I can't tell you how many times I wish I had waited for Kato Unitram.
This is why I neither run trains, or talk about them on my blog. Because they are all in boxes. This stupid tram line and this dumb desire I had to 'improve' the old layout. Well, I'm in it now. Suck it up and stop complaining. There are worse hobbies I imagine.
2.17.2010
Bridge to Nowhere...DONE!
A bridge to nowhere (for now!) is complete! This is primarily an auto bridge that extends from the 'south side' of my city, across a depression, to an as-yet-to-be decided area.
This was a critical part of the tram line....now there really is a destination outside the city for the little people to visit!
The construction was fairly simple....Atlas flex track forms the core of the bridge, with two 1 3/4 or 45mm pieces of sintra attached to the outer edges of the sleepers/ties (regular styrene would work just as well). This gets a color of the same paint that I used for my city streets. The sidewalks are just pieces of styrene, however, I did score them with a knife to give a more realistic look, and then applied some weathering to make the scoring stand out more (I used the same method as I describe in the video in this post. Its very easy and looks great!).
After thinking about several methods, I ended up masking out the yellow lines for the street markings. This method worked pretty well, despite the masking tape taking a little of the gray paint off the plastic base. I will be working on adding this to the rest of the city, which will be much more complicated!
The 'guard rails' on the sides are really the key element. These are from the Kato 23-213 guard rails and road fences. While it was always obvious where the guard rails could go, the road fences had a distinctive design to them that I wasn't sure about....but they sure did come in handy for this bridge! They were attached by drilling very small holes with my Dremel and then inserted and glued into the holes!
The lights are from my favorite manufacturer for street lights...Viessmann. While they are incandescent and not the far more reliable LED's I'd prefer, I'm not aware yet of any good looking, 'warm white' LED street lights in N Scale yet. And yes, in the above photo you can see that (finally!) I am able to start putting buildings back on the layout after this very long revision to my layout!
So this is what's been keeping my busy (well....that, and a little house-keeping on the blog, which was starting too look a bit too cluttered for my test and was due for an overhaul. I hope you like the new look!).
This was a critical part of the tram line....now there really is a destination outside the city for the little people to visit!
The construction was fairly simple....Atlas flex track forms the core of the bridge, with two 1 3/4 or 45mm pieces of sintra attached to the outer edges of the sleepers/ties (regular styrene would work just as well). This gets a color of the same paint that I used for my city streets. The sidewalks are just pieces of styrene, however, I did score them with a knife to give a more realistic look, and then applied some weathering to make the scoring stand out more (I used the same method as I describe in the video in this post. Its very easy and looks great!).
After thinking about several methods, I ended up masking out the yellow lines for the street markings. This method worked pretty well, despite the masking tape taking a little of the gray paint off the plastic base. I will be working on adding this to the rest of the city, which will be much more complicated!
The 'guard rails' on the sides are really the key element. These are from the Kato 23-213 guard rails and road fences. While it was always obvious where the guard rails could go, the road fences had a distinctive design to them that I wasn't sure about....but they sure did come in handy for this bridge! They were attached by drilling very small holes with my Dremel and then inserted and glued into the holes!
The lights are from my favorite manufacturer for street lights...Viessmann. While they are incandescent and not the far more reliable LED's I'd prefer, I'm not aware yet of any good looking, 'warm white' LED street lights in N Scale yet. And yes, in the above photo you can see that (finally!) I am able to start putting buildings back on the layout after this very long revision to my layout!
So this is what's been keeping my busy (well....that, and a little house-keeping on the blog, which was starting too look a bit too cluttered for my test and was due for an overhaul. I hope you like the new look!).
2.09.2010
Short Tram Line Test Video
I took some quick shots of the new tram line in operation! The trolley is Modemo NT87, which is a model of the Keifuku Dentetsu Mobo Tupe 101 "Yuko Go".
The layout is quite bare, but I was able to set up and power the one city block that I have completed. A lot more detail to go into those vast empty spaces you see in this video! I wanted to do this so that after its complete I should have some interesting 'before' and 'after' video!
By the way, the tram line is a combination of Tomix Finetrack (mainly for their tight 103 and 104mm radius curves and matching Tram street detail pieces), Minitrix (for the turnout and terminal spurs) and Atlas Flex track (for the long straight section where I needed a slight bend).
2.06.2010
Final stage of Tram Line Construction
With the tram line almost complete, at least in the city center, I can now finally start to plan out my urban grid! The above photo conceptualizes what I think I'm going to end up with, and I think its going to be pretty good.
The plastic sheeting was used to cover and protect the rest of the layout from the paint that I sprayed on the sintra/streets. I ended up using spray paint from the hardware/home improvement store for the street as my original plan was to use my airbrush for this part of the job was foiled by either bad paint or a bad compressor.
While this was very frustrating, I like the color of the end result. I used a very dark grey, nearly black, automotive primer that was almost the perfect color of black asphalt. I then sprayed over this with some refer grey to give some lighter highlights, and then sprayed over everything with a coat of flat clear paint. The last coat of clear flat paint was a necessity as the dark grey primer needs some protecting and would othewise show marks from the most simple contact on its surface.
I resisted using spray paint at this stage as I was primarily concerned about either messing up my track with the spray paint, or trying to figure out how to precisley mask the rails to protect them from the spray paint. In the end, as it turns out, both of these fears were not necessary as the spray paint came off the rails with the use of a 'rubber' rail cleaning eraser. I was very impressed that this little piece of rubber did such a great job of cleaning the paint off the rails that I will likely give this cleaning method a lot more credit than I did in the past!
The tram project is now past its biggest hurdle and I can start to work on the city! However, once I laid out the structures as shown in the top photo, I discovered that I may have a few too many buildings! This is not a bad problem, of course, as it will allow me the chance to select the best for the layout. I even have a few more structures that I've been accumulating that will make some nice additions I think (more on that in a later post!).
I really can't tell you how happy I am that this part is over! While the Kato Unitram system would have made it a lot easier, there are still no 'straight' sections, and an extended wait until (and if?) Kato comes out with these is something I'm not that patient for! It was a real learning experience to do it this way, but in the end, I'm glad its done and pretty pleased with how it turned out!
1.31.2010
Tram Line Update
Well I knew this was going to be the hardest part of my layout redesign, and I was right. The tram line is a real challenge, and I've had lots of moments of anxiety thinking that I should bag my approach and go with the Kato Unitram (which does mean waiting until more than the basic track pieces currently available are released). But I'm committed to this approach, so best to finish it off!
In my last post on the tram line, I talked about my use of sintra to create the street/top layer for the downtown area, and how careful cutting where the track contacts the sintra is necessary so that the top of the sintra sits just about level (but not quite) with the top of the rails. For the most part, this worked out, but there were some areas where the sintra was too low or there was too large of a gap between the rails and the 'street'. I've tried patching it with both caulk and Testors putty, but both were somewhat difficult to work with.
So guess what? I've ended up using Spackle after all! It actually works pretty well. I think I've got all the street to rail contact areas at the right level so that the street does not lift the wheels above the rail and lose contact, as well as nice level/flush surfaces by all the track.
So, I'm not waiting for the latest coat of paint to dry. I used a dark, dark grey primer color, which I'm starting to like a lot more than my usual lighter grey (I usually use Polly Scale paint's SP Lark Grey, which I think has a nice asphalt tone, but I'm leaning towards a dark color right now).
Here's the evolution of the 'north end' of the layout, from a lower elevated suburban area to part of the downtown with the tram line progress - The top photo is how it looked most of the past year, with the changes from the last month in the remaining photos...a much slower and tedious process than I had hoped, but this is one of those 'permanent' and hard to change layout features that I have to get 'right':
In my last post on the tram line, I talked about my use of sintra to create the street/top layer for the downtown area, and how careful cutting where the track contacts the sintra is necessary so that the top of the sintra sits just about level (but not quite) with the top of the rails. For the most part, this worked out, but there were some areas where the sintra was too low or there was too large of a gap between the rails and the 'street'. I've tried patching it with both caulk and Testors putty, but both were somewhat difficult to work with.
So guess what? I've ended up using Spackle after all! It actually works pretty well. I think I've got all the street to rail contact areas at the right level so that the street does not lift the wheels above the rail and lose contact, as well as nice level/flush surfaces by all the track.
So, I'm not waiting for the latest coat of paint to dry. I used a dark, dark grey primer color, which I'm starting to like a lot more than my usual lighter grey (I usually use Polly Scale paint's SP Lark Grey, which I think has a nice asphalt tone, but I'm leaning towards a dark color right now).
Here's the evolution of the 'north end' of the layout, from a lower elevated suburban area to part of the downtown with the tram line progress - The top photo is how it looked most of the past year, with the changes from the last month in the remaining photos...a much slower and tedious process than I had hoped, but this is one of those 'permanent' and hard to change layout features that I have to get 'right':
1.28.2010
Tram Line Project
The little plastic people of Quinntopia have spoken, and they've decided they want light rail! No longer are they content to pretend to drive their little cars (with wheels that don't move!) or stand on the station platforms as yet again the Thalys speeds on by! No, they want their trolley / tram system!
This tram line project on the layout that has been holding up a lot, and one that I've procrastinated on for quite some time. It is also one of the key drivers of my decision to expand and rebuild my city/downtown...which I feel like I've been talking about on this blog for far too long!
My approach is probably a somewhat unconventional one. There are a few good solutions that I've been thinking about for quite a while. I've never had good results with spackle or plaster, although I know some folks who have done a really nice job with this, I just don't have the skills or patience for this approach. Having been exposed to the Tomix Tram system about a year ago finally got my mental gears going on this, and I've been thinking about how to use this system and still maintain flush and realistic looking streets. I've also been dragging my feet as I've been waiting to see how the Kato Unitram system was going to look and what would be available. I expect someday that I'll regret my own approach as the Unitram system has real potantial, but I can't wait on Kato to hold up my layout construction!
My method, once again, used sintra, that hard, foam-like plastic material commonly used for lightweight signage. For the 'downtown' area where the tram tracks will run, there is actually two layers of this 1/4" sintra; one for the base that sits on top of the styrofoam, and another layer of sintra that is actually the street and which will be cut to match the rail width of the Tomix Finetrack I am using for the tram section of the layout.
This is where the Tomix Tram system comes in. One of the most difficult questions I had to answer was getting precise (or nearly so) curves for the layout. The Tomix Tram sections provided a useful template.
Once I had all my tram track laid out, I just duct-taped the pieces to the sintra, slid the track out from the Tomix Tram section, marked the interior edges of the tram pieces for cutting, and then continued these lines on to the next curve. Pretty simple!


This tram line project on the layout that has been holding up a lot, and one that I've procrastinated on for quite some time. It is also one of the key drivers of my decision to expand and rebuild my city/downtown...which I feel like I've been talking about on this blog for far too long!
My approach is probably a somewhat unconventional one. There are a few good solutions that I've been thinking about for quite a while. I've never had good results with spackle or plaster, although I know some folks who have done a really nice job with this, I just don't have the skills or patience for this approach. Having been exposed to the Tomix Tram system about a year ago finally got my mental gears going on this, and I've been thinking about how to use this system and still maintain flush and realistic looking streets. I've also been dragging my feet as I've been waiting to see how the Kato Unitram system was going to look and what would be available. I expect someday that I'll regret my own approach as the Unitram system has real potantial, but I can't wait on Kato to hold up my layout construction!
My method, once again, used sintra, that hard, foam-like plastic material commonly used for lightweight signage. For the 'downtown' area where the tram tracks will run, there is actually two layers of this 1/4" sintra; one for the base that sits on top of the styrofoam, and another layer of sintra that is actually the street and which will be cut to match the rail width of the Tomix Finetrack I am using for the tram section of the layout.
This is where the Tomix Tram system comes in. One of the most difficult questions I had to answer was getting precise (or nearly so) curves for the layout. The Tomix Tram sections provided a useful template.
Once I had all my tram track laid out, I just duct-taped the pieces to the sintra, slid the track out from the Tomix Tram section, marked the interior edges of the tram pieces for cutting, and then continued these lines on to the next curve. Pretty simple!
After getting the entire outline of the tram line cut out, a process which actually went a lot better and quicker than I had been expecting, I could start to lay it out on the base sheet with the track to check my cutting and the 'fit':
The biggest challenge at this point was creating an inverted 'bevel' on the edges of the sintra that come into contact with the track/roadbed. This is critical, as I've found that if there is an even a hair of the sintra that is higher than the rails, the tram will lose contact with the rail and stop. I could just sand/gouge down the top side of the sintra, but that does look sort of crude and would not have a smooth finish that I was looking for. An Xacto knife and my Dremel tool helped me with this very time-consuming project (the below photo shows the underside of the sintra where the roadbed contacts the sintra)!
After a coat of dark grey primer, the 'street' was then placed back on the layout and more testing and fine-tuning took place.
Once the wiring (including an auto-reversing unit) was complete, the track was attached with small nails, and the street could finally be cemented to the base. At which point, gaps between the rails and the sintra were filled with either paintable caulk or Testor's putty.
As mentioned above, all of the curves are Tomix Finetrack (both 103mm and 140mm), but some of the straight sections are either Minitrix snap track or Atlas flex track. They are all code 80 so there was no problem connecting them together. I did choose to directly solder feeder wires to the bottoms of the Tomix finetrack as the defauly connectors for Tomix were too bulky to properly integrate.
Wallah! Everything works (the reverse unit, the trams!) and it looks like this major milestone on the layout redesign (what I think I've referred to as Version 3.0) is done! Well, almost. I still need to give the street a better color and cover up the gap-filling caulk, add street markings, and add in the center pieces for the curves from Tomix, and straight pieces of styrene for the straight sections.
What this means for me is exciting! I can start to add buildings to the layout and, with this sort of major (and often dirty) construction complete, I can add trains back to the layout! Yeah! Stay tuned for more updates!
Subscribe to:
Posts (Atom)