Below are some photos picking up from my last post. As you can probably tell from the photos, lot's of strip styrene....
For the windows on the roof, I had some transparent Evergreen Plastics sheets on which I masked and spray painted horizontal lines to simulate window panes. On top of this I glued pre-painted styrene strips.
Of course now with the roof finished, I can start to enjoy the station area a bit more!
One of the many tasks that made the project take time, is having to complete various details. The station platforms were built from scratch, painted, marked with pencil, and of course had people and various bits of details added. Something like this can slow down actual roof construction for several weeks!
Interior view with platforms..
I almost did not have glass windows on the roof, but I knew that I would regret not being able to see the station interior from the top, plus I like a bit of ambient light coming out of the station! So I'm glad I did it, but it was yet another complication to the roof project that added at least a month of work.
So, with the station really almost done (Not true: Still a few more details) I can start working on the rest of the city and (believe it or not) actually putting down tracks for the 'main lines'!
I apologize for the dearth of posts lately. Its been freaky cold in Quinntopia (the garage where the layout is) and work has been super demanding. The combination of the two means slowwwww progress.
But that doesn't mean NO progress! I've been building a roof for my station!
I started with some laser-cut trusses from Luetke Modellbahn. There are too long, so some editing was in order.
I measured the dimensions of the station to determine the even distribution of the trusses and rough sections...
With the correct dimensions established, the trusses are laid onto long strips of styrene to form the roof (and the place to attached the LED strip).
With the too-long ends of the trusses trimmed, and a bit of glue, a test fit was in order....
Now to add the roof itself, paint, and the lighting....
But for that...you will have to wait for my next post! Thanks for reading!
Finally! After months and months or planning, building, delaying and so on, we have activity on Quinntopia again! Whoohoo!
Here are some 'action photos'...
On the girder section approaching the station...
On the high extension over the main railway right of way....
Another angle...this portion of the structure was complicated to build as each of my elevated sections is meant to come apart, and also need to be level, stable and look good (while also allowing for four or five tracks below!)
This shot sort of shows the entire loop. Ultimately you won't be able to see the entire loop as much of it will be blocked by buildings!
While much of the time was spent trying to figure out how to scratch build an elevated trestle system, an equally large share of time (and money!) was spent trying to figure out how to automate DCC equipped trains so that they automatically stop, wait, and then depart from the station. The solution to that problem came from the Viessmann 5208. This is an automatic timer unit that connects to insulated rails (a total of four blocks) and allows for automatic detection, stopping and then acceleration.
I was curious about how this unit would work with my Digitrax DZ-125 Equipped Kato Ginza Line Metro, and it does seem to work just fine! Although the 'crawling' section' portion does not feature the deceleration proposed in the items feature lists, which may be due to the decoder (more on this later). These units are not particularly cheap (about $80) and will only operate on one track, but compared to upgrading to a Z21 or Viessmann Commander or ESU ECOS, these are much more affordable options at this time.
Now that I've proven I can get train automation to work, I need to get a second 5208, another 'metro' train (I debate whether I should go for an identical or similar Kato Ginza, or something a bit more 'vintage' looking...any suggestions?) so that the elevated line has real 'action' with two trains running in opposite directions!
Then I can finish the station - platforms, roof, lighting (you can see the electrical leads for my eventual lighting of the station interior in the video!) and then start mapping out streets and building placement! And then, and THEN...its on to laying down track for the 'main' railway lines!
The elevated Metro line is almost complete: All tracks and elevated structures are done with soldered leads, color-coded drop lines, rust painted rails, and flat black base coat. The only thing actually keeping me from running trains is that I still need to add track to the station and wire everything up....
With the basic form of the elevated line now established, I can actually start to move on to other areas....like setting up the actual city and the main rail lines! But, not so fast...
First, all of the elevated structures have come off the layout for two reasons - one additional pass with the airbrush to add a bit more color to the side-wall girder sections (whatever they are called) and to also lay down the sintra material I decided to stick with for my streets/city underlayment. Unlike with my last layout, I felt my city streets were too 'black' and decided to go with a grey color this time (I think it looks more 'worn' and has a slightly older feel).
In addition to the 'flat' city area, my little hill on the north end of the layout is getting straights laid across its terrain!
In my next post, I hope to have the final paint for the elevated structures complete, and have the elevated section completely operating. I have another 'automated stop' device that I will be testing as well. So stay tuned!
A major mini-milestone has been completed! The base for the Metro station is done and the overall station is now 75% complete! What began seven months ago as an idea to do something more classic than the Kato Suburban Station is finally nearing completion! Behold! The Latveria Metro Station!
In addition to the four Walthers Northern Light Power Stations, the building also uses Greenmax Concrete Viaduct Piers as accents. The only item surviving from the Kato station is the stairway shown in the above photo. The above is the 'front' entrance' with a wide pedestrian arcade or entrance...
Above is the rear of the building. Not much to say. I had hoped to NOT have to build a rear to this building to save both time and money, but no better plan presented itself for what to do on the back side, so another long cycle of cutting, gluing, etc... took place.
Another shot of the front of the building. The ground floor is lit with LED strip lights. I used two different colors...a 'white' LED for the common/public areas, and a warmer color for the interior shops.
One of the major challenges to get to this stage was determining what to do with the interior facing walls of the train area. Just painting the plastic would not look good. I thought of adding a thin styrene facade, but the idea of cutting out 40 windows was not something I was looking forward to. Fortunately, paper seemed like a good idea, and the website paperbrick.co.uk has a great tool for selecitng and printing multiple brick patterns. What a cool tool! Made my day. Above is a photo of the printed brick patterns being trimmed to fit the interior walls.
Now that the foundation is complete...I can work on finishing both the elevated metro track system and the platforms/roof/interior of the station. That means we're actually getting closer to running trains!
But not so fast...I still need to figure out how to automate the station stops for the metro trains. After futilely working with some non-conventional items, I am convinced I need to put on the big boy pants and go with a Loconet system / DCC / Computer (or Command Center) to automate these trains. It seems the only really effective way to make it work. Yes, SOME of you tried to warn me of this several months ago...I get it! You were right! :-0
Painting continues on Latveria Station! I need to get the exterior painted, interior detailed, and lighting added so I can add the station to the elevated metro loop so I can start to assemble the city and then add track for the rest of the layout. So this one little (well, not so little actually!) building is the lynchpin upon which all future progress rests!
Below I am starting to add walls for the ground floor of the station....
And in the photo below you can see that more color has been added. I still need to tweak the colors a bit more and figure out what exactly I am going to do about the windows on this station, but it is finally starting to look like a structure!
As I mentioned above, the elevated line is a key foundation for the layout, and in the section where it swings out over the main line I needed to scratchbuild my own elevated trestle so it would look realistic (which is not the same as prototypical!).
Here's another view of the girder work on the elevated section. I was a bit concerned with how this was going to turn out, but I think its going to look allright.
I'm celebrating the completion of the Faller 232298 Villa - now complete with lights! Wow, these kits seem deceptively simple, but so easy to make a mistake...
Anyway, got all the wiring done - which includes the obligatory interior details and painting/weathering.
This Villa has the appropriate look for the powerful overlords who rule over New Quinntopia from their hilltop perch over-looking the city!
For the masses and common people, I can now move back to the Elevated line. Which began with using my handy Dremel to cut away the interior plastic and connectors of Kato's elevated viaduct pieces. So glad I have a Dremel! This would have taken forever with a knife or saw...
The elevated viaduct swerves over the mainline track, so I needed to custom-build supports/viaducts for this section given the height. I considering different solutions, but a combination of Evergreen Plastics styrene and some girder strips from Plastruct will do the job.
I am building the elevated section by first establishing the right vertical hight...details and paint to come next!
That's it for today! Tomorrow is Memorial Day, so let's all remember those who gave all for their country, and hope that all future wars are rare and short.
Until next time...Quinntopia out!
What!? I can't believe its been nearly two months since my last update. Well, its not for lack of spending some time in the old hobby room (although work and other household priorities have been quite busy), but in fact, most of my hobby time has been taken up by a 'secret project' (which has been in the works for several years, and I hope to share on this humble blog shortly) and my impossible quest to figure out how to automate the timed stop for the metro line trains - without having to upgrade to a $600 'command center' or use some sort of JMRI based system (which I get bored reading about everytime I imagine using that sort of solution). So, enough about projects NOT working out, there has been some progress on the Metro Station!. As you can see above (which is a photo from about six weeks ago), I've got most of the facade for the station worked out.
The below shows what the approach from the elevated two-track metro line may look like...
Below are some of the parts, details and related that I've been slowly accumulating for the station. The below are 'girders' to go over the tracks and support the roof, they are from Luetke Modelbahn and are laser-cut wood. For the exterior facade, merely adding in rows of different sizes of styrene (visible in white in the above photos) didn't provide enough detail, so I added in some interesting 'cornice pieces available from Hawk Wargames - made for wargames models of course. Once I get into painting and weathering, I think these details will become more apparent.
I originally wanted to wait on finalizing the elevated section until after I knew exactly where my rail gaps would have to be block isolation and all that, but I've decided I can still add my gaps (or at least plan on it) and get the entire elevated section complete, which has been the focus of today's project.
Below you can see the rough layout of the circuit for the metro. Although its a boring oval, it will be obstructed by lot's of buildings, so that the entire circuit will never be completely visible. I'm using red tape to layout some of the gradual curving portions, and then creating a template to create the actual structures.
The facade for "Latveria Metro Station" is now primed, and I'm starting to lay out the rest of the structure, using various details and pieces from other kits to complete the look.
And that it is it for this update! I hope it won't take another two months for my next one! Thanks for reading!
As noted in my last post, track (and the related elevated track structure) is on hold until I figure out the precise electrical requirements to automate the metro trains. On the other hand, I was able to make some progress, albeit somewhat slow, on the metro station itself.
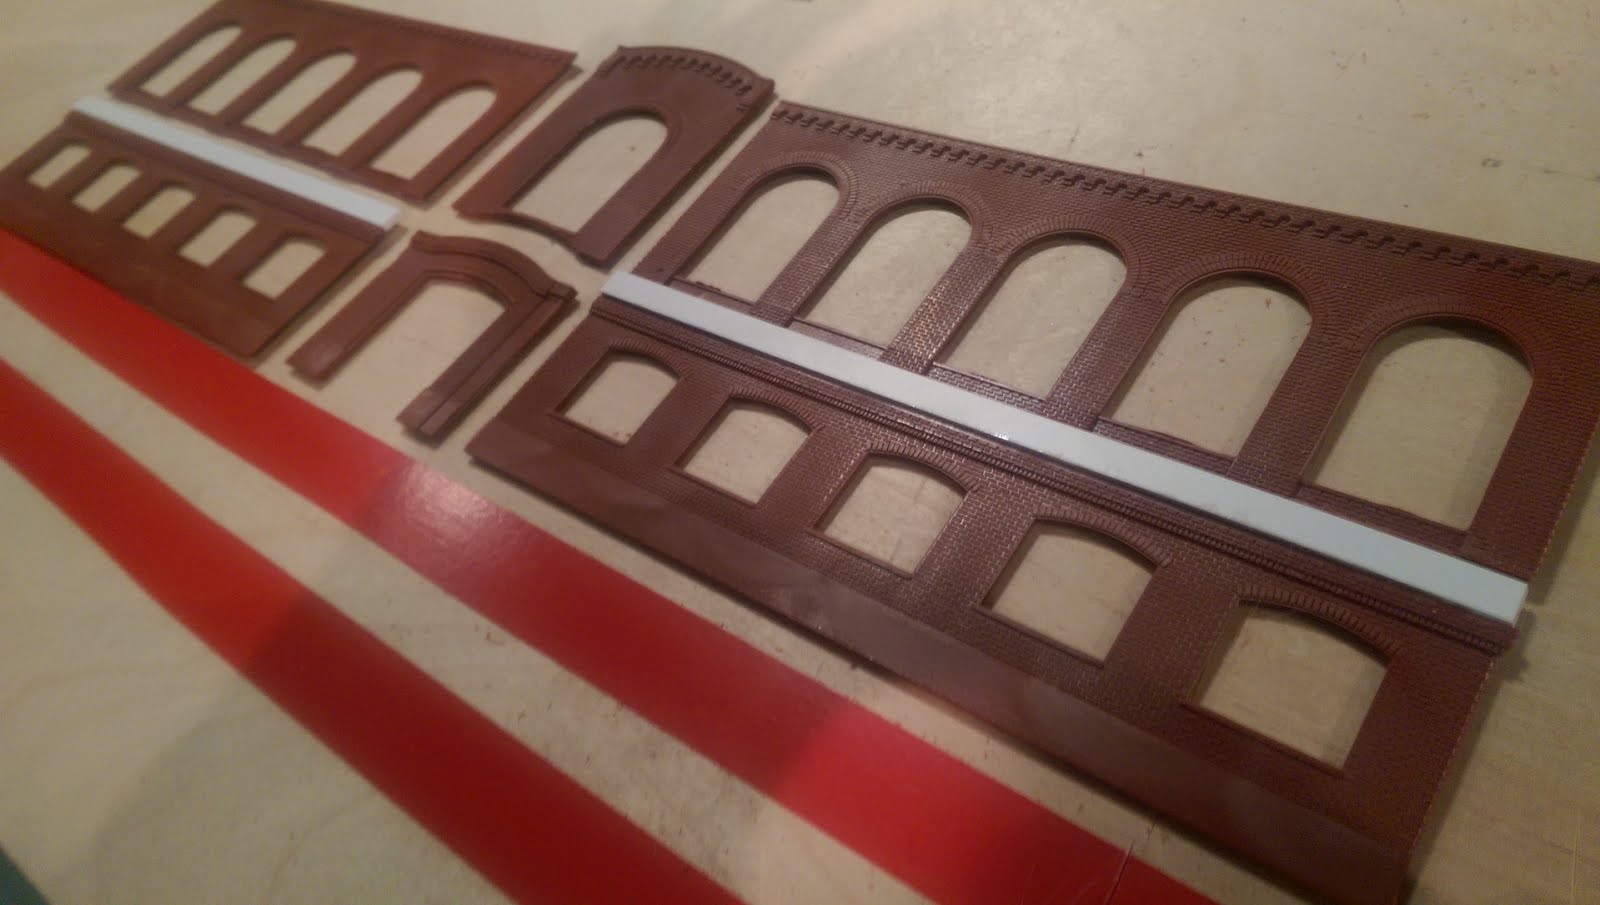
I am using Walther's Northern Light's Power Station as the early 20th Century inspired basis for the elevated station. Its not as long as I needed, nor do the windows align properly, so some cutting and kit-bashing has been required.
First, I had to decide that in order to have the proper elevation for the track level, I would need to add at least 15mm of space between the windows on the ground level. Fortunately, this Walther's kit is made of fairly soft plastic to cutting and filing is not a big issue.
I initially planned on having five windows centered on a central lobby, but I couldn't figure out how to have the right pedestrian entrance on the ground floor; the Kato structure - that was the original inspiration (and will still likely donate some parts) - has a large entrance with stairways which I like a lot.
Ken (of the fabulous Sumida Crossing blog) left a comment (see? I read and listen to comments! At Quinntopia, we're all about listening! :-) ) that inspired me to open up the ground level some more, and be less focused on lining up windows with interiors (if you read his comment on this post, you'll see what he means).
I also decided to lengthen the structure so the entire Metro train will be in the station, so a second Northern Light building was ordered and sacrificed to kit-bashing to help complete the station. I originally planned on have the second Norther Light station used for the 'back site of the station, but now I'm not so sure. Basically, I'm tired of spending money on kits and don't want to order a third, but I expect I may have to!
The photo at the top of this post shows the general look that Latveria Station will ultimately have. Lot's of 'open space' for parking/pedestrians, and nice open entrance to the station proper. I've also ordered some girders and other etched brass detail pieces which I think this project will require to get the right look. This is starting to get fun! Some projects (I have found) are good ideas that require more effort, but then it seems like a 'tipping point' is reached where you find a newfound enthusiasm and vision for the project and it really starts to get FUN! That's where I'm at now. Thanks for reading!