12.24.2018

MERRY CHRISTMAS TO ALL!

Hello everyone! I wanted to wish you all Merry Christmas and let you know that we are getting closer to a move...which will mean a new home with more room for a new layout (one of the reasons I’ve been quiet lately and I’ve dismantled my layouts has been both for work reasons, but also my lack of interest in building a layout and modeling in my garage.).

The other thing I wanted to say (which I’ve thought but never stated) is that the N Gauge community worldwide is pretty awesome. The virtual relationships and friendships that I’ve developed through my blog and YouTube channel over the years have been a profound source of joy, especially in these times. I hope that you have found the same yourself.

Yes, there have been a few criticisms. Most of these seem to be from persons who probably have multiple relationship challenges anyway so it’s easy to brush them off. Some of them seem to lack a certain self-awareness or have an entitled idea of what they think MY content should be (or not be) which is pretty hilarious. As with the advice that “it’s your hobby, do what makes YOU happy” I always followed the same philosophy when creating my videos or blog posts. Yep, maybe not to everyone’s tastes, but that’s not the point. Fortunately I’ve been rewarded with thousands of positive responses and likes, which is cool and says a lot about how cool most modelers are in this hobby.

But not everyone! LOL! Happy Holidays!

8.04.2018

QUINNTOPIA IS SHIPPED OUT

With the "Great Quinntopia Sell-Off" still in progress, I thought I would share this photo of a bunch of buildings going to the Post Office for their new owner!  An interesting side note as that a few buyers picked up nearly all of my buildings, which means that somewhere, someplace, someone is going to have a pretty good share of my urban layout! This makes me happy as I like to think that these buildings will be able to seen together as part of a new city.

I do get quite a few questions about the buildings from people on eBay, mostly asking me if I have any more to sell!  Unfortunately, all the 'big' ones with lights are gone. I do have a few smaller ones and some facades and other odds and ends that I either haven't had the time to list yet, or need a wire reconnected.

What I'm listing now is mostly rolling stock: Locomotive, freight cars, Subway sets, etc...   

I have several items (locomotives and sets) that I think are in decent demand, so I'm going to post a few using the 'auction' model later this week (probably Thursday night). So keep an eye out on my eBay channel (store?) if you're curious....

Its almost impossible to figure out a 'fair' price for all of this.  While, in fact, nearly everything (not all!) that I am selling has been used or opened (and a few pieces with some minor damage or flaws), asking a full, new, retail price is insane! But what about the cost of the added decoder? Or interior lights (for passenger cars)?  Do people care about those? I still get questions about DCC decoders working in analog, so clearly the DCC aspect has little interest for some people.

Even though I tried to price my buildings really fairly (an informal formula based on level of interior detail, amount of interior lighting, amount of work that went into either the kit-bash or scratch-building, and how the end result turned out) with most selling around $140-$160, but a few really large and 'premium' buildings at $300 or more.

But, they all sold within a few days. Does that mean I priced them too low?  Maybe, but I don't think so.  Again, there's always a bit of regret saying goodbye to something that represents literally hundreds of hours of time, but with where my time and priorities are right now, its all good.

I can build more! :-)


7.14.2018

THE GREAT QUINNTOPIA SELL-OFF IS HERE!

Yep, you read that right. I'm selling out. Pretty much everything will go: Locomotives, rolling stock, buildings, track, DCC system, etc...


If you are interested in any of the buildings or rolling stock you've seen on my layout, keep an eye on my eBay store:

https://www.ebay.com/sch/joemesmero/m.html?item=142867973010&ssPageName=STRK%3AMESELX%3AIT&rt=nc&_trksid=p2047675.l2562

My eBay account is listed under "joemesmero". I created that account a long time ago! :-)

If you REALLY want to make an offer on something before it goes up on eBay (or just don't want to deal with eBay), send me an email at quinntopia at hotmail dot com or using the 'contact' feature here on the blog. I will start putting most items on ebay in the next couple of weeks, and proably slowly add more stuff through early Fall. I think there's about a hundred different items to photograph, describe, upload, weigh, etc.. so it may take some time for many items to show up.

Some of you may be wondering....why?

Well, there is not really just any one reason, but many smaller reasons. Here they are in no particular order: I may be moving in an year. While I planned on boxing everything up, that just didn't make as much sense when you consider the next two reasons.... I've also started my own business (its what I've done my entire professional life, and its an ad agency: ) and because that takes up both a lot of TIME and requires MONEY to invest, well....those two things made it hard to find time or resources for more modeling.

Yep, I still love N scale. The trains, the models, the whole thing. But for the next few years, putting everything in boxes seemed sort of pointless to me. I assume that what I sell I can replace (or get something different) or build again.

Many of the items will be those things that I spent a lot of time working on. In most cases I'll probably put a crazy 'buy it now' price on it. Honestly, I have no idea how to value a building I spent over a hundred hours working on, particularly when its not a perfect item. So it'll be interesting to see how this goes!

Please fee free to ask me any questions, and also share this with other N scale modelers who might be interested!


5.19.2018

The Glory of N Gauge! A layout montage video!


Not a lot of actual progress in the past few months, but some new stock and a new video to celebrate! I hope you enjoy!


12.11.2017

QUINNTOPIA IS BACK! AGAIN!


I'm back! This is a short video (really, it's somewhat pathetic as the intro is almost as long as the content. I hope you like the intro anyway) that sort of announces my return to Quinntopia.

I've been distracted. You see, I found this pinball machine for sale back in March.  I've always wanted a pinball machine. I got it cheap (about the price of Trix locomotive with a sound decoder) but it doesn't work. So for the past 9 months I've been restoring it and trying to understand how to make it work. It's almost done, but I missed my trains.

So there you go. Only time will tell to see if this is another famous Quinntopia false starts?


3.12.2017

LAYOUT UPDATE VIDEO!


Here's a short video of the progress I've made on the layout so far...about 15 months into it! But I think I'm willing to publish a video as it seems like the next step is to start adding track!

2.26.2017

CITY PROGRESS PHOTOS

A few images of the current status of the city.  I still have a few more LED-lit cars to add, and need to straighten some light poles (Wow! Its amazing how the camera can reveal the slightest angle) and lot's of details!

Above is the street that will parallel the passenger station tracks (it has a name! Its called the "Avenue of the Liberation of Quinntopia"! See my map here)...below is the area in front of the Metro Station...
 Another shot of the area that will eventually be next to the main passenger terminal.
The below photo should provide a pretty good idea of the layout.  Right now the City is sort of an island surrounded by wood, which will eventually be the tracks.
I still need to add more detail, but I'm pleased with how the Metro Station turned out. I still need to add a decoder to the second Tokyo Subway train so that trains will operate automatically in both directions/
An overhead view of "Minitrix Avenue" on the back side of the Metro Station and the recently completed "Gorham Building".
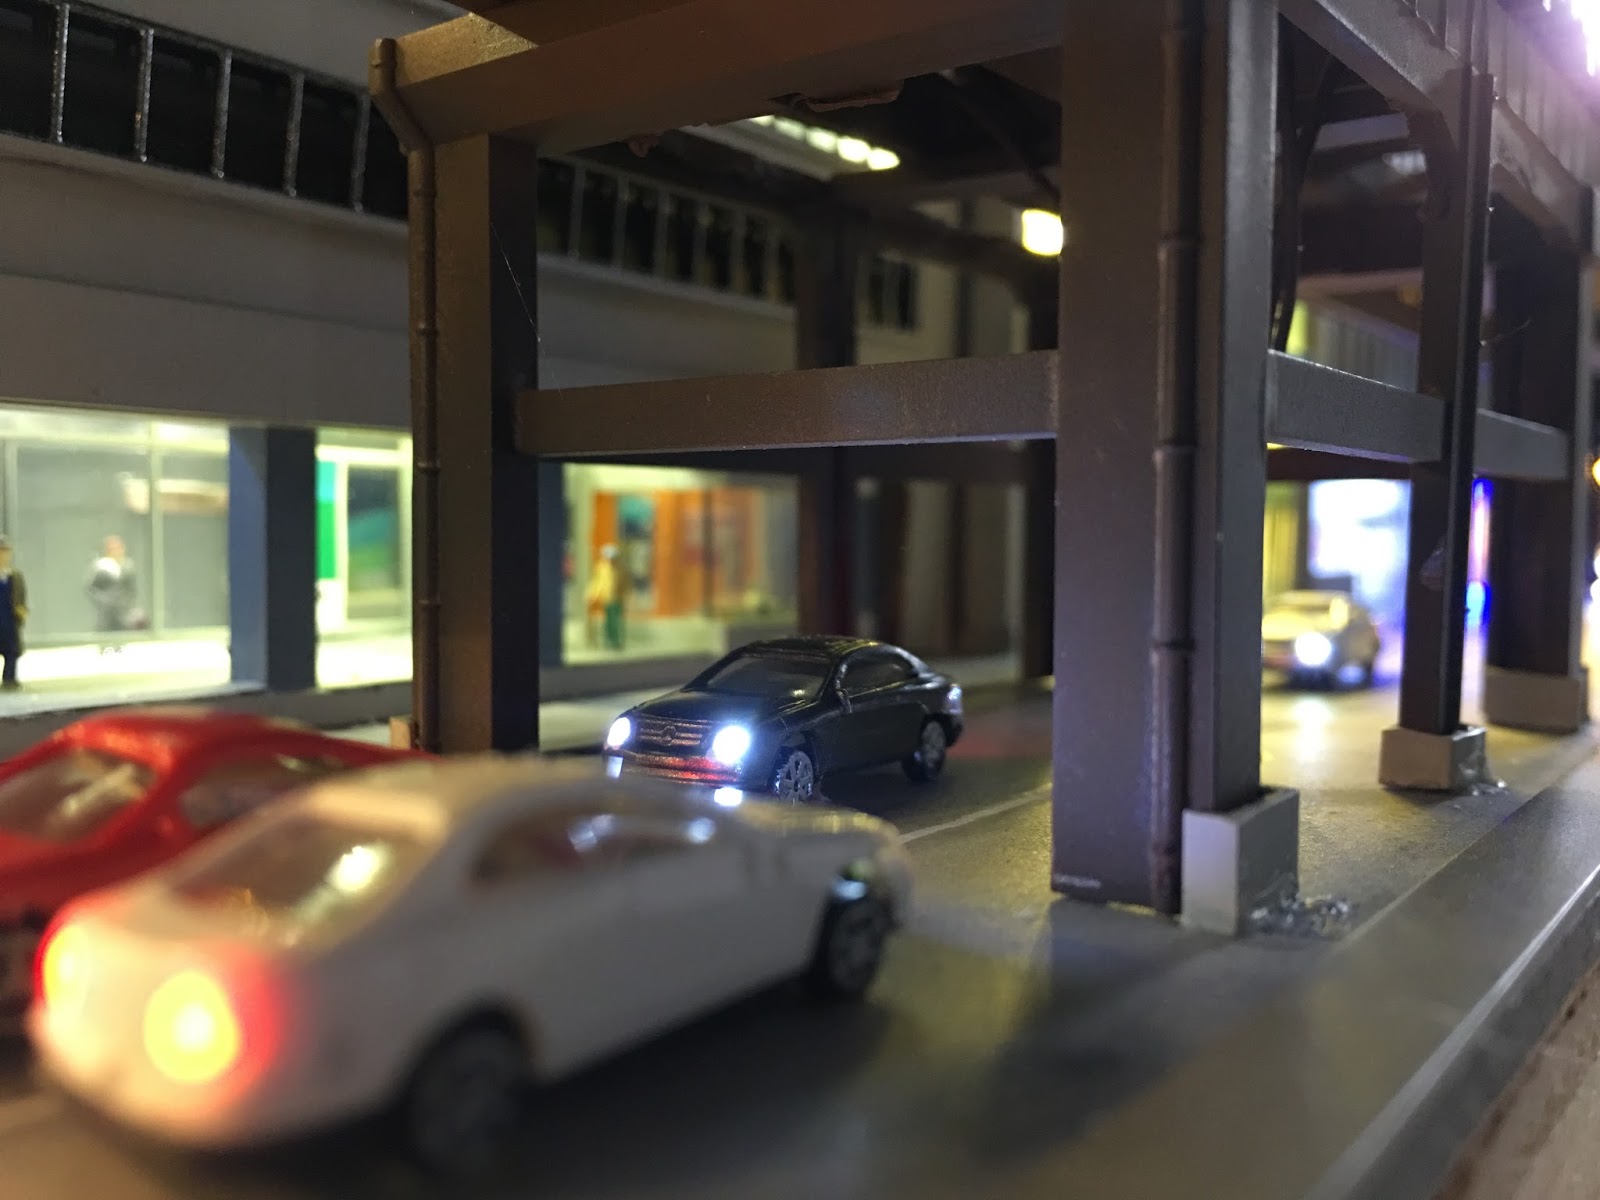
And finally, a street level view under the Metro Viaduct on "Kato Avenue"...

2.19.2017

GORHAM BUILDING COMPLETE

gorham building 1
Hello modellers!

Wow, it's been awhile since my last post. I've been busy!  I'll have a few more updates shortly.

I've been adding my buildings to the layout and arranging them, which also means putting together a few kits that have been sitting around.

I purchased CMR's Gorham Building several years ago (based on this actual building) and I decided to finally put it together. It's the ideal size for a certain spot, and decided it was time to get it on the layout!  Below is the plat where this new/old building will be installed.
The CMR kit is made of an interesting material.  It's a laser-cut sort of styrene or plastic. I actually really enjoyed putting it together. And while the pieces are all flat plastic, once complete they look really nice.

The instructions advise you to paint the structure after assembly, but as I wanted to use different shades of grey for the different layers, I sprayed them all beforehand and then glued after they were painted.


Interior detail was primarily limited the large ground floor entrance/lobby area.

I really like how this building turned out. in addition to lighting, I applied several coats of washes to really draw out the laser cut details that CMR puts on the pieces.
 More updates to follow! Thanks for reading!

1.08.2017

IT'S DONE! LATVERIA STATION COMPLETE!

It's done!

And it only took a year!  Literally.

It was a year ago when I had my basic plan for how I would construct an early 20th Century style elevated metro/subway station.

Hey, these things take time!

Below are some photos picking up from my last post.  As you can probably tell from the photos, lot's of strip styrene....

 For the windows on the roof, I had some transparent Evergreen Plastics sheets on which I masked and spray painted horizontal lines to simulate window panes.  On top of this I glued pre-painted styrene strips.
 Of course now with the roof finished, I can start to enjoy the station area a bit more!
One of the many tasks that made the project take time, is having to complete various details.  The station platforms were built from scratch, painted, marked with pencil, and of course had people and various bits of details added.  Something like this can slow down actual roof construction for several weeks!
 Interior view with platforms..
 I almost did not have glass windows on the roof, but I knew that I would regret not being able to see the station interior from the top, plus I like a bit of ambient light coming out of the station!  So I'm glad I did it, but it was yet another complication to the roof project that added at least a month of work.
 So, with the station really almost done (Not true: Still a few more details) I can start working on the rest of the city and (believe it or not) actually putting down tracks for the 'main lines'!

Thanks for reading!

12.21.2016

ROOFING THE STATION

Hello World of Modelling Fans!

I apologize for the dearth of posts lately. Its been freaky cold in Quinntopia (the garage where the layout is) and work has been super demanding. The combination of the two means slowwwww progress.

But that doesn't mean NO progress! I've been building a roof for my station!

I started with some laser-cut trusses from Luetke Modellbahn. There are too long, so some editing was in order.
 I measured the dimensions of the station to determine the even distribution of the trusses and rough sections...
 With the correct dimensions established, the trusses are laid onto long strips of styrene to form the roof (and the place to attached the LED strip).
 With the too-long ends of the trusses trimmed, and a bit of glue, a test fit was in order....
 Now to add the roof itself, paint, and the lighting....
But for that...you will have to wait for my next post! Thanks for reading!

11.26.2016

STREETLIGHTS AND LIGHTING BUS

With most of the sidewalks and street markings complete in the Commercial District and station area, I am now adding street lights! Below is what they look like ---without power!
I'm using very inexpensive, yet surprisingly good-looking LED light posts from We_Honest (and others) from China, available on eBay.  They are straight LED's without resistors, so you can't just hook them up to your accessory output - you need to add resistance.
However, one of the challenges with these lights is that the wire connectors are a very fine gauge - maybe 30 AWG or so? Pretty difficult to work with - particularly after being threaded through the layout and working over your head under the layout.  The goal is to speed up and minimize the time and effort connecting hundreds of wires under the layout.

My solution to this is to create a 'lighting bus'.  This is simply a thin, narrow material using copper tap (or somethings bare copper wire) attached to both sides.
The resistors are added to one side (I'm using 470 ohm resistors - you can wire these lights in series with lower resistors, but its actually more work to connect these tiny wires than just attached each light separately to its own resistor).
Then these strips are hung or attached underneath the layout parrelel with the streets and the wires from the street lamps.  Now its just a couple of quick taps with the soldering iron to soften up the solder and attach the wire tips and their bare wire leads.  Voila! Done!

In addition to street lights, having this wire bus also makes it easy to add lighted cars.  As you can see in the below photo!
I'm working out from the Station area towards the Commercial district: Below is looking up the Avenue of the Liberation of Quinntopia towards the Commercial and Residential areas.
Piko Street passes under one side of the station and connects Avenue of the Liberation of Quinntopia towards Minitrix Avenue and then onto an end where it does a hard right and turns into Kato Avenue.
 Next! More lights! Once the street lamps (and cars) are installed, then buildings can be placed.


11.20.2016

MAP OF NEW QUINNTOPIA!

As the municipal electrical employees begin to add street lights to New Quinntopia (having completed adding all of the necessary street markings last week), the city planners have published their first map of the street layout of central New Quinntopia!

The central area of New Quinntopia is currently laid out in three sections.  Below is an overview of the central area with some of the key features:
Starting from the left, there is the undeveloped industrial district, which may or may not have factories:
Next to the industrial area, and bordered by the QMT (Quinntopia Metropolitan Transit) line, is the Commercial District. This is the area where the main QMT station is located (Latveria Station) along with many office towers and hotels.  Planning is underway for the intercontinental railway station Gare de Quinntopia. Which will be completed someday. Probably.

On the right side of the Commercial District, the elevation grows and clusters of houses and apartment buildings dot the hillside.  This area is also currently undeveloped.  There is some concern from city planners that the ground has a strange pink appearance and is very soft.  Outside consultant assure future residents that layers of a new environmental solution called plaster will cover up the toxic and unsightly mess. Everyone is happy.
The City Planners have also given each street a distinctive name.  The below images show the city streets without the QMT elevated transit overlay.  As you can see, Latveria Station faces the Avenue of the Liberation of Quinntopia (named after a famous battle that took place in Quinntopia).   On the opposite side of the station is one of the main thoroughfares of central Quinntopia; Minitrix Avenue. The station is bounded by Piko Street on the left, and Tomix Street on the right.  A very narrow street - Roco Street - bisects the block opposite the station.

Moving to the right of the station, we see that Minitrix Avenue continues, while the Avenue of the Liberation of Quinntopia turns into a one lane road before ending at Fleischman Way - where the future train station will be built.  Parallel to Minitrix Avenue is another major roadway: Kato Avenue.  Here in the heart of the commercial district both Minitrix and Kato avenues cross Fleischmann Way and Arnold Way before they continue on and merge in the residential areas along the hillside.
Unfortunately, New Quinntopia is not a great destination as no one road yet known to us actually leaves New Quinntopia; so if you get there, you may never be able to leave!

11.13.2016

STREETS & SIDEWALKS

The very tedious process of creating sidewalks is finally nearing completion.  The process I've come up with takes several steps, so it's been...well, tedious!
The good news is that I am now moving on to much more interesting steps.  Namely, the placement of street markings!  This is another somewhat time consuming step, but when its all done it will be worth it!
Once I have all the street markings down (almost there!) I'm going to weather the streets with some weathering powder, and then apply a flat clear-coat over the whole mess. Once that's complete, I'll add street lighting and then the buildings are added!
The last time I create street marketings was six years ago, and I used a similar solution: dry transfer decals.  However, my experience last time led me to prefer the dry transfer decals from Japanese company "TGW".  The Busch are nice, the Faller are difficult (but that might be because they are old and the decals have dried out?) and Woodland Scenics leaves too much glue residue. I ordered the TGW street markings from Hobbysearch Japan.  While not perfect, they apply really well and don't have tendency to crack or break as much. I had to trim the crosswalks to avoid a specifically Japanese style, but this was just a minor step.

And like I said....soon the buildings are coming back! Here is my jam-packed workbench with most of the large structures out of their storage boxes! Soon!