3.14.2013

Amsterdam Hobby Shops

Late last month I took advantage of a business trip to Europe to take a day off for train-spotting and (maybe) some shopping!  On my way to visit the Nederlandse Spoorwegmuseum (Netherlands Railway Museum in Utrecht) I spent some time in Amsterdam and scouted out a few hobby shops.  Since my interest is mainly N Scale, I'll give you my review and some general directions based on my own personal interests in the hope that they will help other fellow travelers!

I was able to visit 4 model train specific hobby shops, three of which are located fairly close to the central Amsterdam area, while one (Harlar Modeltreinen) is located about halfway between the central area and Schiphol airport.

Schaal Treinen Huis: The fist shop I visited had the appropriately named "Schaal Treinen Huis" and is easily accessible via Tram Line 3 (or 7).  Note that I found the Tram drivers to be extremel helpful and friendly and made this trek for this English traveller quite easy.

The shop had a lot of nice materials for layouts and a decent selection of HO, but not too much in the way of N gauge.  Its probably worth a stop if your in the neighborhood as it is really convenient to the central area (perhaps a place to sneak off to while your wife visits the Rembrandt museum?), but for N gauge materials, not too much.
Hobbyland: The second shop I visited was called Hobbyland, which is fairly easy to get to from Tram line 1.  Located across the street from a park, I had hoped to find more N Gauge here, but alas, it is primarily an HO shop.  Rumor has it that the owners will be retiring soon and will be shutting their doors soon, so check ahead if you decide to visit to ensure they are still open!
Marklin Store: My third visit was a bit further out on the periphery of Amsterdam out near Amstelveen.  Tram line 5 was able to get me to "Station Zuid" where a 5 or 10 minute walk found me at the Marklin Store in Amsterdam.  Of course, a Marklin store can't be expected to have more than a few Minitrix items, and this store did indeed have a nice selection of Minitrix locomotives and rolling stock.  I had a nice chat with the clerk who was working there, who encouraged me to visit their 'bigger store' further out from Amsterdam. 
The quest for Harlar Modeltreinen Getting to Harlar Modeltreinen using public transit (or at least the tram lines) requires taking Line 2 all the way out to the very end of the line at Nieuw Sloten.  Once off the tram, follow the bike path through this very suburban area.  Eventually this bike path T-bones at a roadway named "Vrije Geer" where you take a left at this roadway.
Walk alongside Vrije Geer for a while which will take you in a West/Southwest general direction.
Vrike Geer eventually T-bones into another street in a more commercial area, where you again take a left and walk along for a few minutes (head towards the windmill) where you will cross a small bridge over a a canal.
Once across the bridge, you are in the little hamlet of Badhoevedorp, where you will find the street Badhoevelaan. which looks like a residential street with a few small shops along the way.
Almost to the end of this street you'll come across this sign - which means you have arrived at your desitnation (perhaps after a 15 minute walk).
The shop is actually down a driveway behind this blue house.
A large display window makes the shop quite obvious!
The store manager was kind enough to allow me to shoot a few photos of their very clean, nice shop layout!
The good news for modellers like myself, was a very good selection of European N Gauge materials, with a very healthy selection of Fleischmann and Minitrix locomotives, as well as Hobbytrain, Brawa, and others. 
Plus, plenty of rolling stock!  Definitely the best destination for N scale in terms of breadth and depth! And well worth the walk and tram ride to get to the shop! Important to note as well, is that its also pretty close to Schipohl International Airport as well.


3.09.2013

Locomotive Roster: Hobbytrain H2654 SNCF G2000

Greetings again fellow N Gaugers (and other scales and hobbies of course)!  Today we review something that was quite an enigma to me.  Announced last year by Hobbytrain was a release of the G2000 locomotive in several different liveries.  Upon first seeing this announcement by Hobbytrain, like many people I wondered if this was the same model previously marketed by Mehano?  Mehano, like several other manufacturers in the past several years, has going through some financial difficulties, so it seemed possible that to raise some cash Mehano would let someone else take over marketing of one of their finer locomotives.
I already had one G2000, of course, in the black MRCE livery.  I've enjoyed this locomotive so much that getting a second one was always an option, and having seen that Hobbytrain was releasing this in the SNCF Fret Benelux livery, it was definitely on the list!  So last Christmas, this locomotive arrived with several other items!
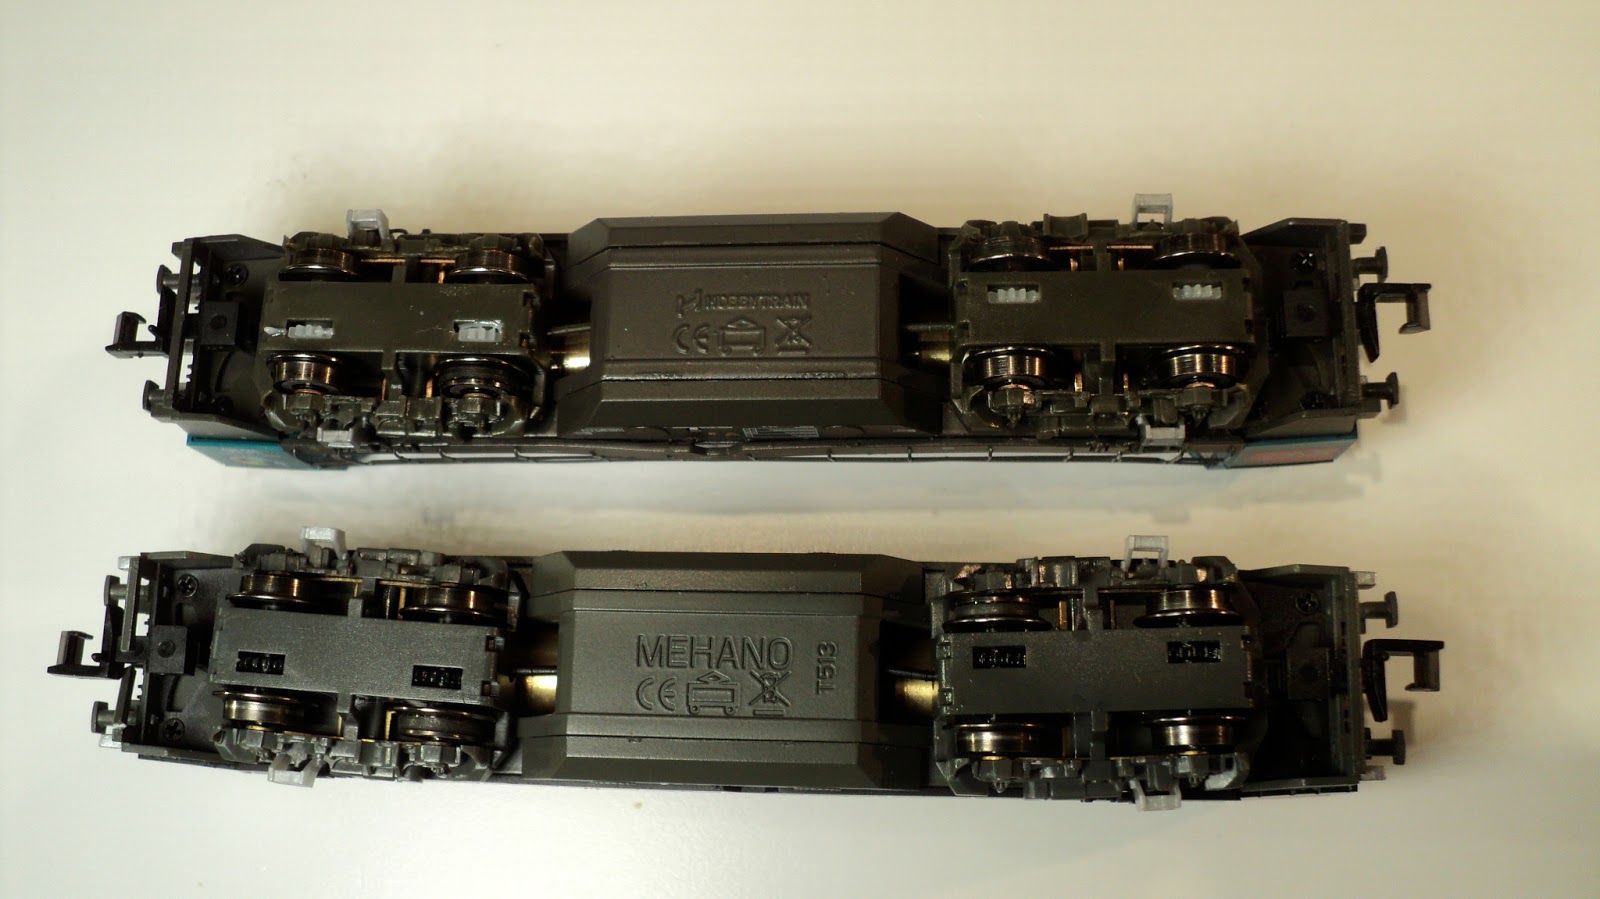
One of the first questions I had (although my this time my suspicions that this Hobbytrain model was basically the same as the previous Mehano version) was to see how it compared to the MRCE G2000.  Other than some basic details (the livery, of course, as well as the Hobbytrain stamp on the bottom of the fuel tank instead of a Mehano mark) its the same model.  Which is good news as the Mehano model was excellent!
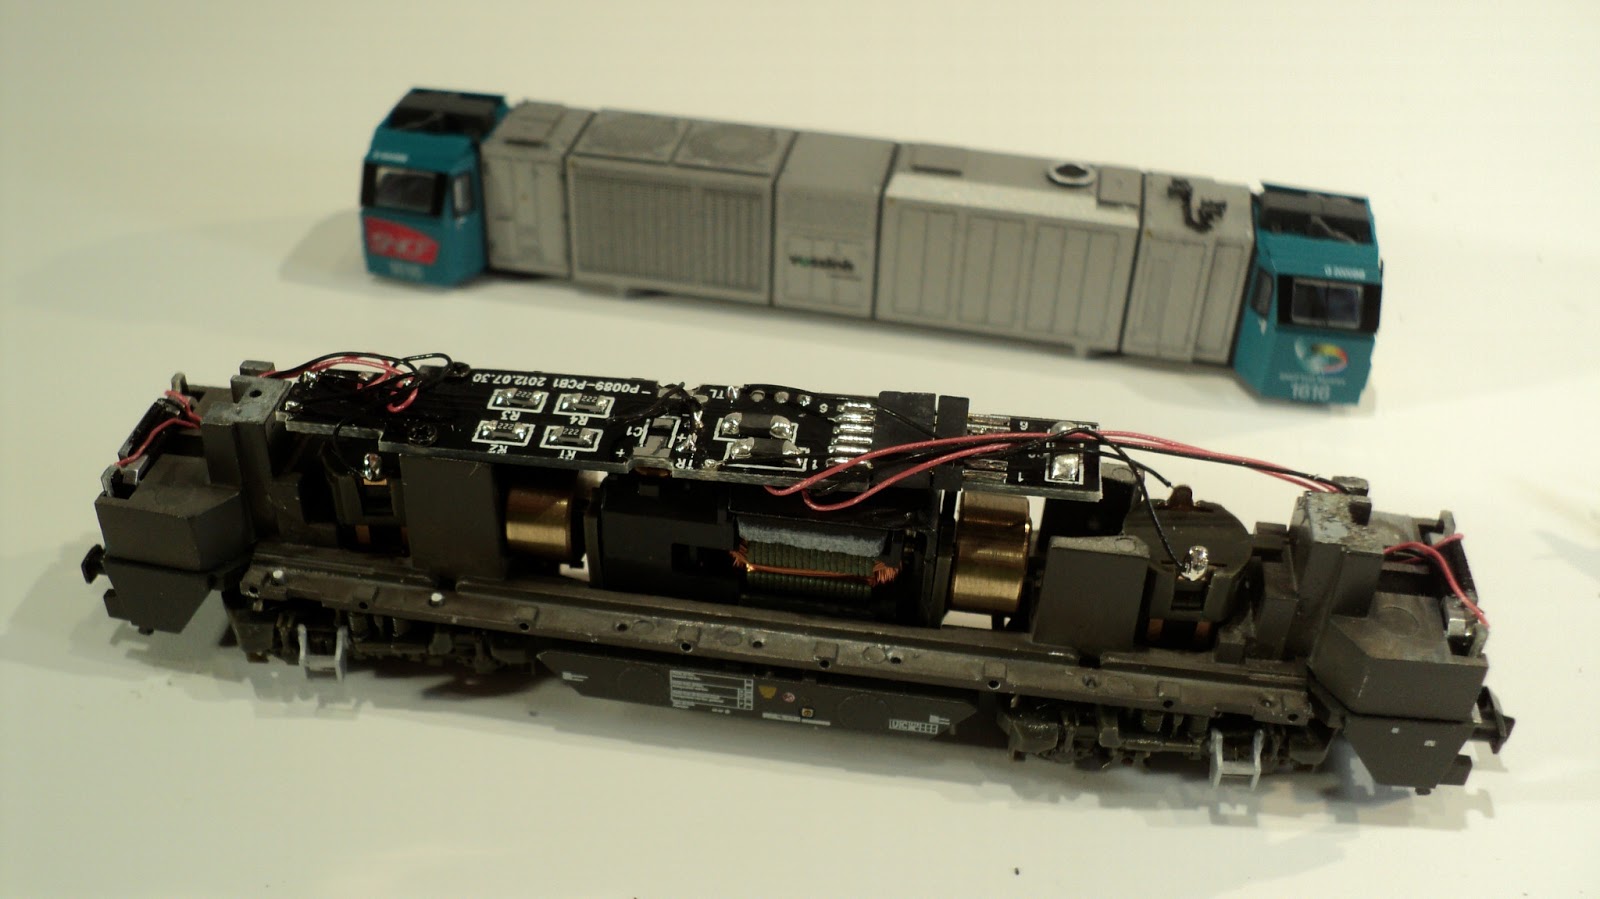
So I won't go into too much detail on this model as I've covered this in both the video and in the previous G2000 review, although I will talk more about one of the challenges with this locomotive (removing the chassis for the decoder install).

I will mention one thing.  The green color of the cabs was a question of some debate on the forums, and (notwithstanding my own challenges with 'white balance' in my own photographs!) I think the green color looks correct when compared to the prototype photos I've seen on the web compared to this model.  Of course, that's my opinion and I could be way off! It does seem to be a shade of green that is very susceptible to the ambient light conditions so it can be sort of distorted based on the lighting, camera settings, etc...
Removing the Chassis from the Mehano / Hobbytrain G2000:
I briefly explain this process in my video review, but I think a post is much easier to follow.

Something else of interest is that I removed the chassis (for what should be the same model!) in a completely different manner than I did the first time for the black MRCE version!  With the MRCE version, I was somehow able to remove the cab sections on both end, which allowed me to remove the 'center' shell section.  This time the cabs seemed to be on much tighter than I remembered, so I looked for other ideas on how to remove on the web and discovered this approach.

What I discovered with this approach is that you need to remove three parts on each side before you can remove the chasses to get to the decoder: the side facade, the walkway, and then (and only then) the handrails.

Step 1:  Gently pry off the facade section below the walkway.
Using a very fine tip point, this covering piece snaps out of little connections that hold it to the side of the locomotive.  The first photo below shows the start of this process.
Once these side pieces are removed, you then have access to the diamond plate walkway section.
Step 2: Gently pry up the walkway section.
This step is actually quite tricky as the walkway (at least on my model) was inserted very firmly and some firm - yet gentle - pressure was needed to lift the walkway out of the plugs that hold it down.  Unfortunately during this process some of the 'plugs' snapped.
In the below photo, you can see that the walkway has been removed, but also notice the two small white bumps on the left side.  These are two of the connecting plugs from the walkway that snapped during removal as I mentioned above.  So be careful! Not really sure how this happened (and it did not seem to adversely affect my re-installation of the walkway later, so no apparent harm done).

Step 3: Remove the metal handrails:
Somehow I thought that the handrails could be removed without taking out the walkway first.  As it turns out, this is impossible.  And my efforts to try and remove the handrails WITH the walkway in place led to some unnecessary distortion of the fragile (but very nicely done) metal railings.  So lesson learned...handrails come off AFTER the diamond-plate walkway!  And they come of very easily (just by lifting up, as its the same walkway plugs that hold the handrail sections on).
Step 4: Gently pry shell up at the little tabs holding the shell to the chassis.  As I recall, this was a really easy step.  The only thing that slowed me down here was stopping to take a photo!
Once the shell is off, of course, you can remove the 'dummy' plug from the NEM651 socket, and add in the NEM 651 six pin decoder of your choice!
And thus, we close on yet another review!  Coming soon is a review of another new train set I received at Christmas - but this one is from Japan!  As always, thanks for visiting Quinntopia!

2.28.2013

Auhagen Building Kitbash & Installation; Part 2

Well, I don't have much in the way of step by step photos to accompany this post, but as you can tell from the photos the Auhagen kit bash (started in this post) is not only completed, but installed!

I needed a corner building for the backdrops, so the overly 'thin' Auhagen kit was a good candidate for some rather generic-looking city apartments over shops/retail.  I dispensed with the original ground floor provided with the kit for my own more appropriate city-style ground floor.
Its hard to tell but I attempted to create the appearance of illuminated letters over the cafe by having the 'CAFE' sign be backlit by LED's from the cafe interior.  Its not terribly succesful, except that if I had done nothing the letters and Amstel logos would be dark!

The technique is to use laser-printable transparency sheets made for overhead projectors (Note: some of you younger folks might want to look up what an 'overhead projector' is as they seem to have been replaced by much fancier computer / LED projectors! :-) ).  Anyway, the trick is to layer several strips of the design (designed in a drawing program on my computer) with the letter areas left 'white': which will show up clear when you print and allow light through.  A final layer with colored letters (and the Amstel logos) goes over the top.  Its a fair amount of work, printing, and trial and error for a result that is only just okay.  I need to work out the kinks on this approach.
The interiors were created with scraps of paper that were originally created for the interior walls of other buildings, but could be used on the ground floors for the 'retail' sections of this building without a problem.  The shop/cafe windows are clear acrylic with more transparency sheet print-outs - this time with window pains and door details.  The rest of the ground floor is just scratch-built with styrene.
In total, this project used the following LED's:
  • One SMD LED on the rooftop to illuminate the advertising sign on the roof.
  • One 6 SMD LED section of LED strip on the ceiling interior to illuminate the apartments.
  • 3 'clear white' 3mm LED's for the Cafe sign back-lighting and the cafe interior.
  • 2 ' sunny white' 3mm LED"s for the Auhagen shop next to the Cafe.
I think this building works really well in the backdrop; it helps to break up the overly uniform appearance of my two earlier facade scratchbuilds in this area, and its height helps to transition from the shorter buildings near the station to these taller buildings behind the terminal tracks.
How about those cool (and cheap!) LED lit cars from China?  More on that in the future!