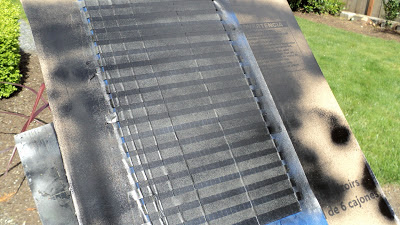
An update on the Faller 2293 Office Building inspired kit-bash that I started last month....
Painting! And some pretty boring process pictures that will hopefully explain more than me having to write about what is really a fairly boring and time consuming part of the building process!
Well, anyway, the top photo and the one below show the first color that I used for the facade sections - which was Tamiya AS-8 "Navy Blue" - and is clearly way too dark.
The photo below shows the completed silver 'window frames' that I masked with Tamiya 6mm masking tape. Applying the silver paint (actually, Model Master 1451 "Aluminum Plate") in several very light coats helps to minimize bleed-through. On top of these the plastic facade sections will be glued.
I then resprayed these sections with a lighter, greyer color; Tamiya AS-19 "Intermediate Blue". Although it looks not-at-all 'blue' in the below photo (!), I think it did turn out to be a better color!
While the facade sections (which are the original 'blue pieces' salvaged from the original 2293 kit) now look about ready to start applying, more work is needed on the windows. Not very visible in these photos are the cuts in the acrylic sheet I made to create different sections for the windows. I don't know how to explain it better, but I think it will be apparent on my next post!
What I did decide to do was to put down some black paint on the opposite side of the silver window frames. There are two reasons (maybe more) for this: I did not want to put masking tape across the silver paint as I am concerned the tape will lift some or all of the silver paint off the acrylic. Second is that I think the effect of the opaque, black window section will look better on the back side of the acrylic, and will look a lot like many modern buildings do (which don't tend to be full glass from floor to ceiling).
Again, several light passes with the black paint....
Until at last it seems that the color is on thick enough and opaque enought. After the tape is removed, this is what I have left:
I think once the blue sections are applied this building will start to take on something of its final look. I am wondering if this building will resemble its inspiration more than did my original attempt! Hopefully the next post will have photos with a clear idea of what I am getting into!


Quelle patience pour disposer correctement tous ces rubans de masquage.
ReplyDeleteMerci Francois! Yes, it was a very tedious process! But easier than trying to paint straight lines!
ReplyDeleteI would love to see you do a complete video on a scratch built historical type building.
ReplyDeleteWhat thickness transparent sheets do you use? I've tried to look for this stuff but I can only find it in really thick sheets that would seem like 2' thick glass in n scale.
ReplyDeleteThanks everyone!
ReplyDeleteBaron - I'm using acrylic that is about 1/8 thick, so yes, VERY thick at 1:160 scale! My expectation is that you won't really see or notice how thick it is for the most part. It can't be too thin since it needs to be rigid, which limits the options!