2.26.2012

Locomotive Roster: Ferrovie dello Stato (FS) E.424; Mehano 23946 & 18939

The search is over! After much hunting I was finally able to acquire not one, but two of these very interesting electric locomotives from Italy.  With their striking, angular looks and both the sublime brown paint scheme or the very 1970's stylistic striping, and with obvious rivets in the body, they have an industrial look to them that modern locomotives just don't have.
 
These models come from Mehano, and were originally produced (as far as I can tell) about 10 years ago in the 2000-2001 time frame.  As such, they don't include any provision for adding a DCC decoder without some difficult modifications and wiring.   I was able to find a helpful guide to show me how it could be done, and yet this was still one of the most difficult conversions I've ever had to make.

There are two big challenges converting this locomotive to DCC, the first is that you will have to mill out some of the metal chassis to make room for the decoder, and the second is that you will have to weave your wires to the circuit board located on the bottom of the locomotive - which was very different as typically you find the circuit boards mounted on top of the motor and chassis!

The below two photos show the Navetta version, in grey with the orange and yellow stripes, which I discovered to my surprise in the bottom shelf of the N Gauge locomotives display case at Les Cheminots on the Rue de Douai in Paris last summer.
Its a great little looking electric locomotive (there is something about the smaller electrics that I find really appealing.  Like my BLS 420, the small size is something very endearing) and makes me want to invest in FS rolling stock to look more at home!
In addition to the Navetta, I also now have the e.424 in the brown Isabella scheme, which I was able to get by begging a seller in Italy to agree to ship to the states!  I also have the old Lima version....I picked up a non-running Lima model of this same locomotives for $5.00 just for fun.  Compared to the Mehano, the years have not been kind to the Lima as the more modern Mehano version certainly seems to out perform its predecessor in just about every way.  The Lima version is show on the right, with the Mehano on the left:
For those who love angular lines (and I know there are quite a few, given some of the preferences I've heard voiced for the older TDV Sud-Est versus the sleeker design of the newer TGV (and all newer high speed trains for that matter)) this is a great little locomotive - and the rather utilitarian yet also elegant brown paint scheme really gives this little electric a very nice, rugged, industrial look!
Both of these locomotives come with a separate pack of add-on grab irons that need to be applied to the model, its something that I've yet to do, but as I look at the locomotive, the empty holes where these would go cry out for me to get this task done....
I say a lot more about the performance of this locomotive in the video review, and despite my admiration for the look and appearance of these locos, they don't live up to the performance expectations of most of my fleet (and the ranking I give in the video will reflect this!)...they are really slow geared-no high speed here!- and my Navetta version has some really bad gear issue which forces me to run it in only one direction!  As I mentioned above, converting to DCC was a headache!

It appears that Mehano is again marketing these locomotives (after a hiatus of several years as they went through their own bankruptcy drama), and if you have a passion to add these unique locomotives to your fleet then no obstacles will stand in your way! 

2.20.2012

Building SKYNET - the video!


Need help sleeping?  Then this video might just be the answer you are looking for!  Seriously, after a lot of questions on how I go about lighting buildings, I thought I would present a video showing the various steps I took to add lights to the TOMIX 4018 building.

I should note that each building sometimes requires a slightly different method or approach to best figure out how to add the lights, interior details, or wiring, so the process or steps I used for this building may not apply for a lot of other structures.  Anyway, I hope you find this enjoyable, or at least as a cure for sleepless nights!

2.19.2012

Welcome SKYNET to Quinntopia!

Construction is now complete and the newest corporate tenant of growing downtown Quinntopia has now moved in and the glaring red logo of SKYNET now stands above all other structures!

Re-modelling what was once the former Skeletor Financial Center, the sleek, black granite 25-floor monolith replaces this once iconic Quinntopia business.
The new structure features a 3-story ground floor with wide seeping windows,  a security desk, and banks of elevators:
Situated right across from the downtown station, workers are just a short walk from their workplace.
The gleaming black structure now dominates the skyline as its tallest building....
The technology used to power the SKYNET structure features state of the art SMD LED's

Power is distributed to each floor through a new method of using long, rigid, copper wires, which are then soldered at each floor...making wiring much simpler and cleaner!
Work is also under-way on a video documentary covering the construction of SKYNET (for those with authorized security clearances only) and we look forward to.... HEY! What are you doing here? That's a funny accent, are you Austrian? Hey..what is that!? No, its okay! Put that down, put that.....
(end of post)

2.03.2012

Fixing a Loop Problem -Update


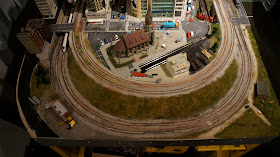
I've been making some time to make some the first changes to the 'loop problem' I mentioned on an earlier post.  The problem (which the huge number of comments seemed to agree was a good 'problem' to fix!  Thanks for all the great ideas and comments!) was having a loop of track which very artificially creates a 'loop' around the scenery.  So the idea is to do what the real railroads have to do...hide it underground! :-)

Anyway, using track on hand and available (and therefore not having to spend any money) I removed the switch that would be difficult to access with the new 'tunnel' idea and added the second loop of track to extend the side from said switch/turnout.  The below is what it looks like.  I did some test runs and it all works great!  The next step is to start building the framework for the 'elevated' city section that will cover this area and tie in with the back drop buildings seen in the background at the top of the below photo.
I then measured and cut a piece of sintra for the 'base' and some corresponding pieces of wood to hold up the new base, and I start to get an idea of what these modifications will do for this area of the layout:
From the opposite end:
Again, one of the reasons for taking the time with this area of the layout is to think through all the different ways to do it.  To be clear, there is no 'right or wrong' way for any of layout builders! Assert your independence!

However, as I already have an awkward 'lasso of city' on the older V1 section of the layout, I was loathe to create the same basic 'feature' all over again!  Unfortunately, this area is quite a project to fix as I have loops at two different grades!